Tuesday, December 14, 2010

Homemade Caramels

Hello everyone!! It's been an unforgivable amount of time since I've last posted on here! Needless to say, it's been a crazy few weeks! But I'm making up for it with lots of butter and heavy cream (as usual!).

Let me tell you.....when it comes to making candy, I've had some serious cooking disasters. Last year alone I turned burnt sugar into a charred, smoke alarm ringing, smoke-filled kitchen mess on not one.....not two.....but three separate occasions. But as they say, "time heals all wounds" and this year, armed with my brand new candy thermometer and much trepidation, I was ready to try again! And, as you can see from the picture on the side.....success!!!

The secret is this..... when it comes to making candy, you need two things: a candy thermometer (don't even try to eyeball it. Trust me. Unless you were raised in Switzerland making candy at age 5 for Lindt, you will probably screw it up), and your undivided attention. Thats right....no multitasking. You must stand there and stare at your sugar until your eyes almost fall out. Don't turn your back for a second. No playing with your dog, no checking facebook, no running to the bathroom, nothing. If you can do that, you'll be golden. Let's make caramels!!

Before you start with the ingredients, prepare your pan. Line a 9x9 baking dish with greased parchment paper. Now you're ready!

There's really not a whole lot of ingredients! You need sugar, corn syrup, butter, salt, and heavy cream. That's it!


In a small saucepan, measure 1 cup of heavy cream, 5 Tablespoons of butter, and 1 teaspoon of salt. Bring to a boil, then remove from heat and set aside.

In a large, heavy bottomed saucepan, add 1 1/2 cups of sugar, 1/4 cup light corn syrup, and 1/4 cup water. Whisk until the sugar is dissolved and it starts to simmer.

Here comes the fun part. Put your whisk down and just watch it simmer. You can swirl it around occasionally, but mostly just watch it. After a few minutes it will start to turn into a light caramel color. (Remember: no looking away!! Pay attention!)

When the sugar mixture is a light golden color, gently whisk in the cream and butter mixture. It will bubble up and sound pretty terrifying. Hang in there!! Everything will be okay!


Stick in your candy thermometer and let it bubble for about 10-15 minutes. (You should whisk it pretty often). The thermometer should read 248 degrees.

When the temperature is right, pour your caramel mixture into your lined 9x9 baking dish. (Be careful! It's super hot). Let it sit there for about two hours.

When it's nice and firm, pull the paper out of the pan and lay it flat on the counter.

Slice into 1 inch squares with a sharp knife.

*Side note: You can individually wrap these in waxed paper. Don't try to store them all smushed together in a bowl. They will just mold back into one big caramel. Yes. I'm telling you from experience.

Enjoy!


Saturday, November 13, 2010

Salted Toffee Chocolate Bars

It is a gorgeous day today in Rochester, NY! It's a balmy 60 degrees, which is virtually unheard of for November in this neck of the woods - (we usually are getting hit with snow right about now). And boy do people around here know how to take advantage of random good weather. Grills are uncovered, the tennis courts are full, and joggers are taking over the sidewalks as everyone tries to soak in as much late sunshine as humanly possible.

Our neighbors are throwing an impromptu barbecue this afternoon, and I wanted to whip up something to bring over. I found these cookie bars from Martha Stewart's "Everyday Food" and decided to give them a try.

And.......wow. They are seriously good. Like addicting good. So good that I'm really tempted to just be a bad neighbor and go to the barbecue empty-handed so I don't have to share.

And the best part? They are the easiest things in the world to make!

Here's what you'll need:

Graham crackers, almonds, toffee bits, butter, sugar, bittersweet chocolate chips, and coarse sea salt.

Preheat your oven to 350 degrees. Grab a cookie sheet with a rim and line it with aluminum foil.

Now take about 13 graham crackers and line them up on the cookie sheet, edges touching, until you have a solid layer. (You may have to break some up to fit......that's okay)

Sprinkle with 8oz. of toffee bits. (That's usually a whole bag. Just throw it all on there)

Next, toss on about 1 1/2 cups of chopped almonds.

Now things get crazy....

Take 1 cup of butter (yep....that's 2 sticks) and 1/2 cup of sugar and bring it to a boil in a small saucepan.

Once it boils, reduce the heat and let it simmer for about 2 minutes, until it looks thick and bubbly and syrupy. Kind of like this.


Immediately pour the butter mixture over the graham cracker layer. Stick the whole thing in the oven and bake for about 12 minutes, or until the sugar topping is nice and bubbly.

When you remove the pan from the oven, immediately sprinkle on about 3/4 cup of bittersweet chocolate chips and about 3/4 teaspoon of coarse sea salt.

Use a sharp knife or a pizza cutter to cut them into about 2 inch squares. Let them cool completely before serving.


Enjoy!

~Megan

Monday, October 25, 2010

Dulce de Leche Cookies

My first experience with dulce de leche was in Russia of all places. I was volunteering for a month with a youth organization to help teach English and run a camp for children and teens. Since the camp was located on an ex-military training site, living conditions were quite bleak. No electricity, no running water, and borscht. Everyday. Served by an extremely intimidating russian woman who would bang on the table with her ginormous soup ladle if you didn't finish what was in your bowl. We secretly called her "the soup nazi".

Anyways.

At the end of the camp week, we had a big celebratory dinner. I was on the dessert making team. We opened can after can of this heavenly creamy caramel stuff and mixed it with........wait for it......butter. Then layered it between stacks of thin 'pizzelle ' like cookies. It was heaven.

I later found out that the heavenly experience was indeed dulce de leche. And it has been near and dear to my heart ever since.

I recently came across this recipe on "Joy the Baker's"food blog. I have to say....it was her blog that got me hooked on food blogs in the first place. Her content is hilarious and her recipes are fabulous! She came up with these little gems and now I'm so excited to share them with you all!

Here's what you need:

Flour, sugar, butter, brown sugar, baking soda, salt, 2 eggs, 2 cans of dulce de leche and some coarse sea salt

Preheat your oven to 350 degrees. Line two baking sheets with parchment paper (or in my case baking spray) and set aside.


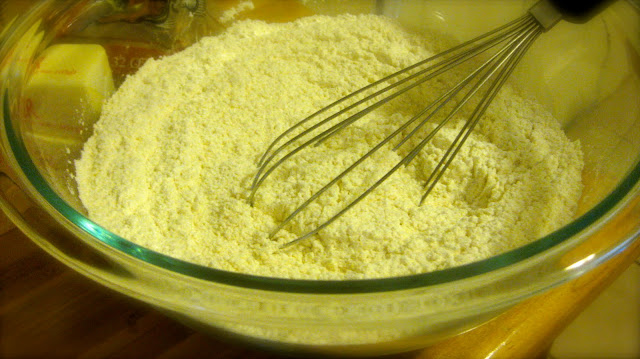
In a medium mixing bowl, whisk together 2 1/2 cups of flour with 1 teaspoon of baking soda and 1/4 teaspoon of salt.


In a large mixing bowl, beat 2 sticks of butter until light and fluffy. Yep, you heard me. Two sticks of butter.


Add 3/4 cup of dulce de leche, 3/4 cup of packed brown sugar, and 1/2 cup of white sugar to the butter. Mix to combine.


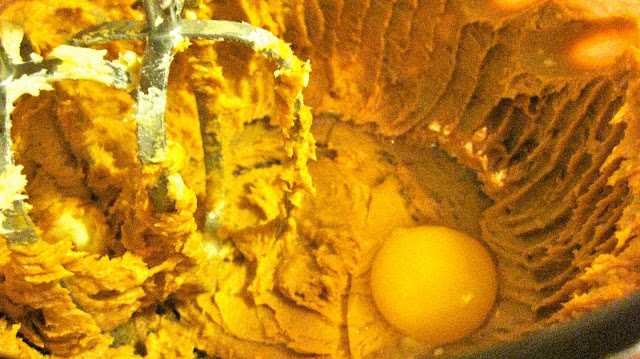
Add the eggs one at a time, mixing well after each one.


Now add the flour mixture to your mixing bowl and combine. Make sure not to over-mix!


Drop them by heaping teaspoonful's onto a *prepared cookie sheet. (*Note: the recipe actually says to line the pans with wax paper. Since I was out, I just used a baking spray. I think they would have been a little easier with the paper!)

Pop them into a 350 degree preheated oven for about 10-12 minutes. When they are done, let them cool on the pan for about 2 minutes, then transfer them to a cooling rack.


When the cookies have cooled, spread on some more dulce de leche. Sprinkle on a few grains of sea salt and top with another cookie.

There you have it!

~Megan

Enhanced by Zemanta

Sunday, October 17, 2010

Maple Apple Crisp

Let me start by telling you a story.....

When Steve and I were in college we were introduced by a mutual couple friend of ours at a garage sale. Our eyes met over a lumpy green chair and......he, being the rather quiet, reserved type that he is...began to stutter and blink rapidly while I (still having yet to outgrow my incredible awkwardness around anyone of the opposite sex), blurted out something completely insane and ran off.   Not a very promising beginning.

However, the situation was redeemed when our group of friends decided to go apple picking for Steve's birthday. Steve and I managed to have a few minutes of some fumbling conversation and then....be still my beating heart....he bought me a donut.

Well, you know how it ends.

Each fall we go back to the same orchard and pick excessive amounts of apples and eat excessive amount of donuts. It's tradition.


And each fall I try figure exactly what I'm going to do with the bajillion apples I thought were completely necessary to take home.

Well, I will tell, if you have a bajillion apples (or even only 5) you should make this apple crisp.

Because I can promise, life will be significantly better if you do!

Here's what you need:

Apples, maple syrup, cinnamon, brown sugar, flour, salt, rolled oats, and butter

Preheat your oven to 375 degrees.


Peel, core, and slice 5 medium apples and throw them into a bowl. Sprinkle with cinnamon.

Now, take 3/4 cup of maple syrup and pour it over your apples. (Btw - use good maple syrup. If you use the fake stuff, thats what it will taste like - fake maple syrup. gross.) Stir until the apples are evenly coated.

Pour the apples into a medium baking dish. (a square 9x9 dish works just fine).

Now we're going to make my favorite part....


In a medium bowl, add 1/2 stick of butter, 1/2 cup of flour, 1/2 cup of brown sugar, 1/2 cup of rolled oats, 1/4 tsp. salt, and 1/2 tsp. cinnamon.

With a fork or a pastry cutter, cut in the butter until everything is combined and resembles coarse crumbs.

Sprinkle evenly over your apples.

Bake for about 35 minutes. (Or until golden brown and bubbly).

Let it cool for a while, then serve!


Enjoy!

~Megan

Sunday, October 10, 2010

Super Awesome Chili

So, I've thought long and hard about whether or not to add "other" food to Chasin' Cakes. I mean, there's more to life than just desserts right? Right?

Well anyways, the proverbial "straw that broke the camel's back" was chili. Not just any chili, but this chili. It's perhaps one of the most soul warming soup dishes I've ever made. And I had to share it with you!


Here's what you need:

Vegetable oil, minced garlic, 2 medium onions, 1 lb. ground beef, 1 lb. cubed sirloin, 1 bottle of dark beer, 1 cup of strong coffee, beef broth, brown sugar, cocoa powder, chili powder, cumin, italian seasoning, tomato paste, diced tomatoes, kidney beans, chipotle peppers in adobo, salt, pepper

Heat 2 Tbsp. of vegetable oil in a large soup pot. 

Chop up 2 medium onions.

Add the ground beef, cubed sirloin, chopped onions, and 3 cloves of minced garlic to the heated oil. Cook for about 10 minutes until the meat is browned. 


 When the meat is browned add one 14 oz. can of diced tomatoes, juice and all.

Then pour in your 1 bottle of dark beer. I used Guinness, but by all means, use what you like.

Then pour in one cup of really strong coffee. Exciting stuff.

Add in two small cans of tomato paste.

And 14 oz. of beef broth.

Now we're going to add in all of our spices: 1/2 cup packed brown sugar, 3 1/2 Tbsp. of chili powder, 1 Tbsp. cumin, 1 Tbsp. cocoa powder, 1 tsp. Italian seasoning, 1 tsp. salt. Add it all in.

Now we're going to add in the secret weapon. Chipotle chilies. 

Chop up two and add them in. Attractive looking aren't they? 

Now add in two of the 4 cans of kidney beans. Simmer for an hour and half. 

When an hour and half has gone by, add in the other two cans of kidney beans. Simmer for another 30 minutes. Trust me....it's all worth the wait. 

When it done, serve with a nice dollop of sour cream and enjoy!!

~ Megan